Canvas Power Apps and Offline Use – Images

I saved the most interesting topic for the last part of the article series. Namely, photos. Can photos be attached to observations/leads/tasks/etc done offline?
Yes, you can. This time, let’s go through different ways to implement this.
Table attachments
The first thing that comes to mind is to use standard functionality, i.e. attachment files that can be attached to the row.
Let’s allow attachment files from the table properties.

Let’s add an Attachments field to the Power Apps task form.

This way we can attach 0-n attachments to tasks.

Or can we…
Everything works perfectly with the workstation’s browser. However, in the mobile version of the application, the images are nowhere to be seen.

You can attach pictures to tasks on a mobile phone. But when the task is edited after this, the pictures are disappeared.
Interesting.
The attachment files of the record can be found in the Notes table. Let’s add a screen to the application that displays its content. The image added on the mobile is saved there exactly right.

The content of the Notes table will not be available in the application (on mobile) until we add it to the offline profile we are using. We want to include only images related to the tasks transferred to the device (related rows only + Tasks).

Now we see that the images are also available in our offline application.

So the problem is not the use of the Notes table, but the attachment control of the form. It doesn’t work in offline application.
Adding attachments with the Add image control
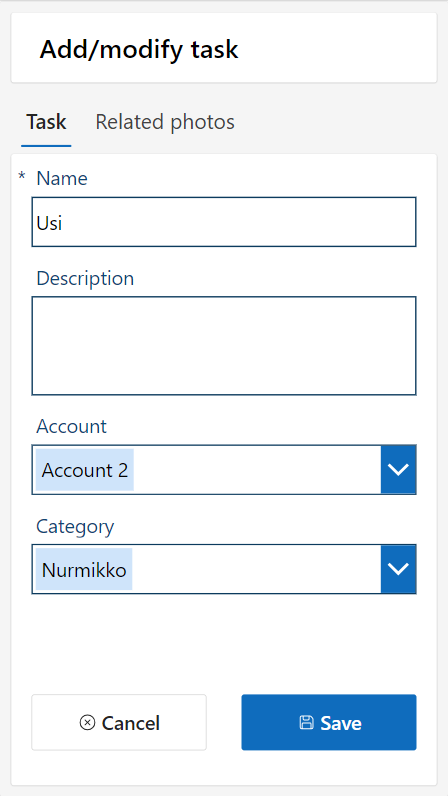
Let’s split the task screen into two parts. On the first tab, you enter the basic information of the task and on the second you add the pictures related to it (Into the Notes table). The result looks like this.
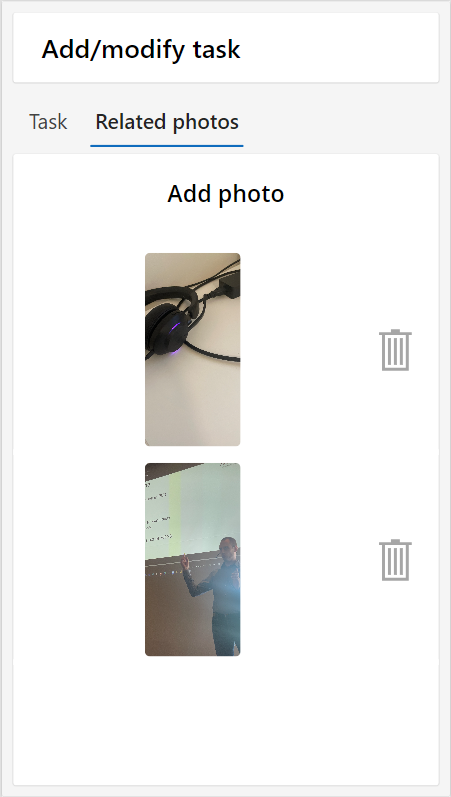
In the photo gallery, notes related to the task are displayed. The filtering condition is a little more special than the traditional one. Notes can be connected to different tables, in which case the regarding column must first be told (AsType) which table we are referring to.
Items = Filter(Notes, AsType(Regarding, Tasks).Inspection = gblSelectedItem.Inspection)
The pictures do not appear as they are. Let’s add some metadata to them.
Concatenate("data:colon;image/jpeg;base64,",ThisItem.Document)
Finally, let’s add the Add Picture control to the screen. Let’s tune it up a bit. Set the text to “Add photo” also when changing the picture (Text, 1). Finally, hide the image preview control (UploadedImage1_2).

The image is added with the Patch command in the button’s OnChange event. The image file (UploadedImageNotes.Image) is not saved as is but needs to be manipulated a bit.
OnChange: Patch(Notes, Defaults(Notes),
    {
        Regarding: gblSelectedItem,
        Document: Last(
            Split(
                Substitute(
                    JSON(
                        UploadedImageNotes.Image,
                        JSONFormat.IncludeBinaryData
                    ),
                    """",
                    ""
                ),
                "base64,"
            )
        ).Value,
        'Is Document': true,
        Title: "test",
        'File Name': "test.jpeg"
    }
)
Now everything works fine.
Custom table for pictures
If for some reason it is not possible to use the Notes table, we can always make our own table for the task attachments.
The table has a column for the image itself, as well as for the task related to it (Lookup).

Let’s check the table to be used also in the offline mode (table properties) and add the table to the offline profile we use. We only include images related to the tasks we are moving to the device. This way we can keep the number of images stored on the device moderate.
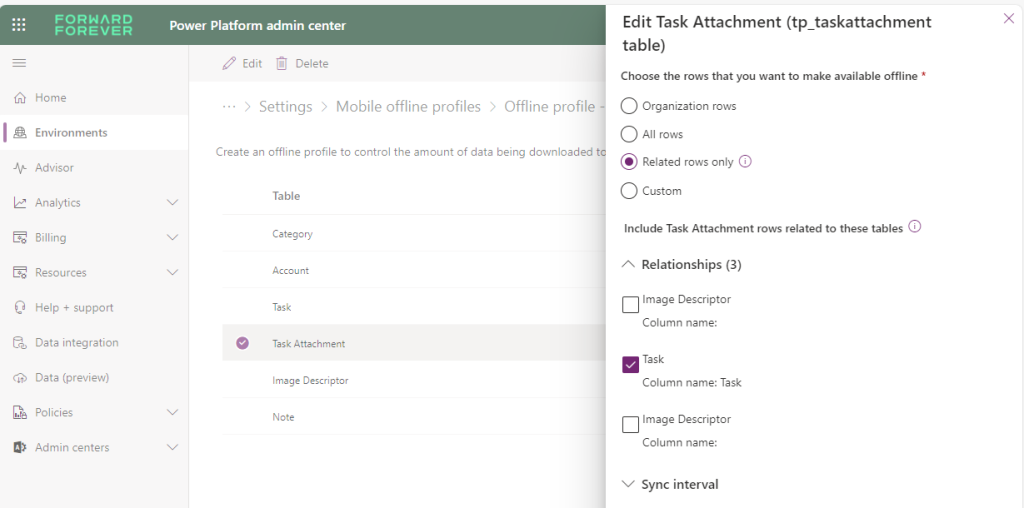
Remember to publish the edited profile!
Finally, the implementation is changed to use the Task Attachment table instead of the Notes table. Adding and removing attachments feels faster on mobile than when using a Notes table.
Separate image columns in the task table
Of course, you can also add images directly to the task. In this case, we limit the number of possible image attachments. In our example, the task has three image columns, that is, a maximum of three images can be attached to the task.

For the image columns to also work in offline mode, the Image Descriptor table must be added to the offline profile. Let’s pick up the lines that are related to the image columns of the task table. For some mysterious reason, the user interface does not display column names.

In the Power Apps, the easiest way is to add all the image fields we created to the form.

The solution is a bit clumsy. It can be improved a bit by hiding all but the first image field. And by showing a new image field only when an image is added to the previous one.
We can also present the images in the gallery like the previous examples. From which they are then saved in their own fields.
In this case, the image is always added to the collection first. The gallery then shows the contents of the collection.

The Add photo button should be hidden when the maximum number of photos has been added.
When saving, the images in the collection are added to their columns.
Patch(
    Tasks,
    gblSelectedItem,
    {
        'Image 1': First(
                colImages).Image,
        'Image 2': If(CountRows(colImages)>1, Last(
            FirstN(
                colImages,
                2
            )
        ).Image, Blank()),
        'Image 3': If(CountRows(colImages)>2, Last(
            FirstN(
                colImages,
                3
            )
        ).Image,Blank())
    }
);
Summary
It requires a bit of work, but in Canvas Power Apps, which works offline natively, you can attach image files to Dataverse rows. Which often is one of the requirements.
In this case, you should be even more careful when defining the offline profile. So that mobile devices don’t end up with image files that users will never need.
You saved my life, this had me banging my head against a wall for a full day, I also went down the notes table route, but you got me over the line.
Can this be done with the attachments control instead of the add picture control? I notice that the attachments control has the name, value pair instead of .Image
I tested it with using Dataverse table ootb attachments and with those the attachment control didn’t work. I could save the attachment, but it didn’t show saved attachment. I assume it is same in all cases, but haven’t tested.