Complementing existing IT-solutions with Power Apps

Power Apps is often categorized as a tool for quickly implementing new standalone applications. And it’s a great tool for that.
Often less attention is paid to another way to utilize the Power Apps. It is an excellent tool to complement existing tools.
Let’s have a look at a recent example.
Efecte and getting asset data with using a barcode
Efecte is a Finnish company with an IT service management solution (ITSM) that is quite popular and widely used around here. As a result of its market share, some customer organizations may need to utilize it in a creative way. In a way that Efecte does not (yet) directly support within the product. For example:
- Integrate ticketing-related communication into Microsoft Teams
- Use the API / RPA to create the actual order to the supplier after the end-user has made an order with Efecte
- Provide some subset of Efecte services using an internal chatbot (open a new ticket, show the status of opened tickets, etc.)
However, let’s set aside these kind of scenarios and build a mobile app for the IT support person. The application is simple. With the app, the end-user can scan the barcode attached to the workstation or printer. After that:
- The app displays basic information about the scanned device (name, type, owner, date of purchase, etc.)
- The app shows old tickets associated with the device
- A new ticket can be created from the app

Let’s get started!
Flow – Get Asset x information
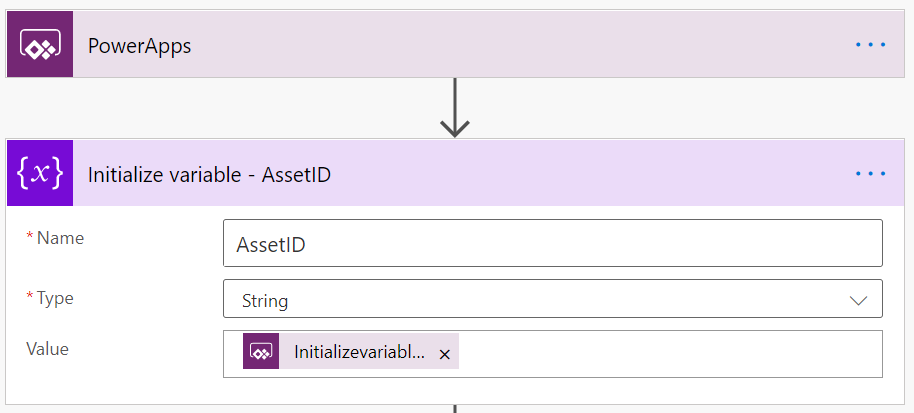
First and foremost, we need a flow, which retrieves the scanned device data from Efecte. The flow is triggered from Power Apps and we need to store the device identifier (AssetID) obtained from Power Apps as a variable.
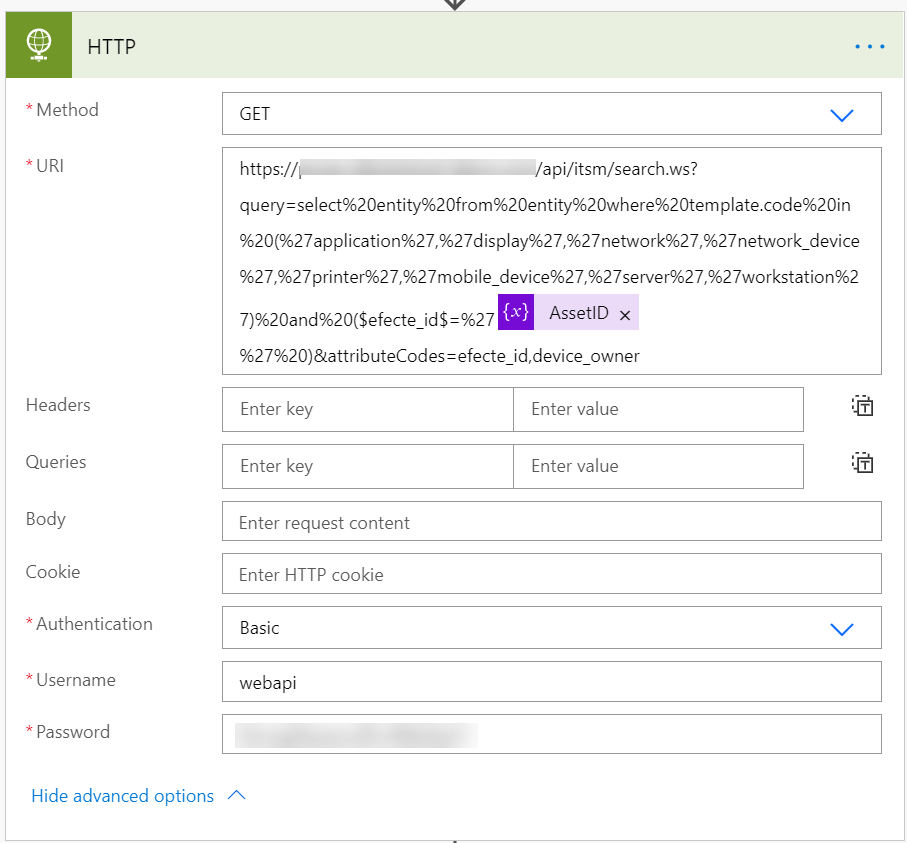
After that we get all the information related to given device with using the Efecte API.
Using the API is straightforward:
- Basic authentication
- All searches are done into the itsm module: https://your_organization_efecte.com/api/itsm/search.ws
- The query is embedded in the url using EQL (Efecte Query Language) syntax like SQL
- The AttributeCodes url parameter can be used to specify which fields the return message contains
- Remember to convert all special characters inside the query!
- The return message is in XML format. Not in JSON.
If we want to retrieve a device (monitor, printer, telephone or computer) related to the (asset) identifier (efecte_id) “PRI-000022”, we do the following query:
https://your_organization_efecte.com/api/itsm/search.ws?query=select entity from entity where template.code in ('display', 'printer', 'mobile_device', 'server', 'Workstation') and ( $ efecte_id $ = 'PRI-000022') & attributeCodes = efecte_id, device_owner
In the flow we naturally use the identifier received from Power Apps:
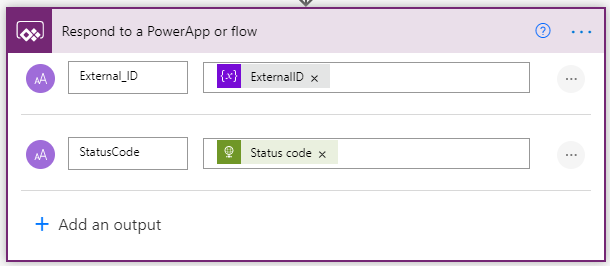
Finally, the response is returned to Power Apps. This is done with the Response function to include the schema of the return message.
The return value (from Efecte) has to be converted from XML to JSON:
json(xml(body('HTTP')))
Tip: To create the first version of a schema, store the value returned by the HTTP request in JSON format in a variable, and take advantage of the “create a description using an example” feature in Parse JSON.
Flow – Get tickets related to Asset x
Tickets associated with the device are retrieved in a similar manner. The query used is just a bit different:
https://your_organization_efecte.com/api/itsm/search.ws?query=select entity from entity where template.code = 'incident' and $ related_configuration_items: efecte_id $ = 'PRI-000022'
Flow – Create a new ticket
To create a new ticket, we store the parameters we receive from Power Apps into their own variables. E.g.:
- Name of customer
- Customer email
- Subject
- Description
- Related items
- etc

At the same time, we create an external identifier (External ID) for the ticket we will create. We can use that external id if we need to retrieve the ticket we created from the Efecte during the process.
Next, we create a ticket. The address to use is https://your_organization_efecte.com/api/itsm/dataCardImport.ws. Data for the new ticket is in the body (in XML format).

After the ticket is created we return the needed data to Power Apps:
Power Apps
The preparations have been made and now we can finally build our app.
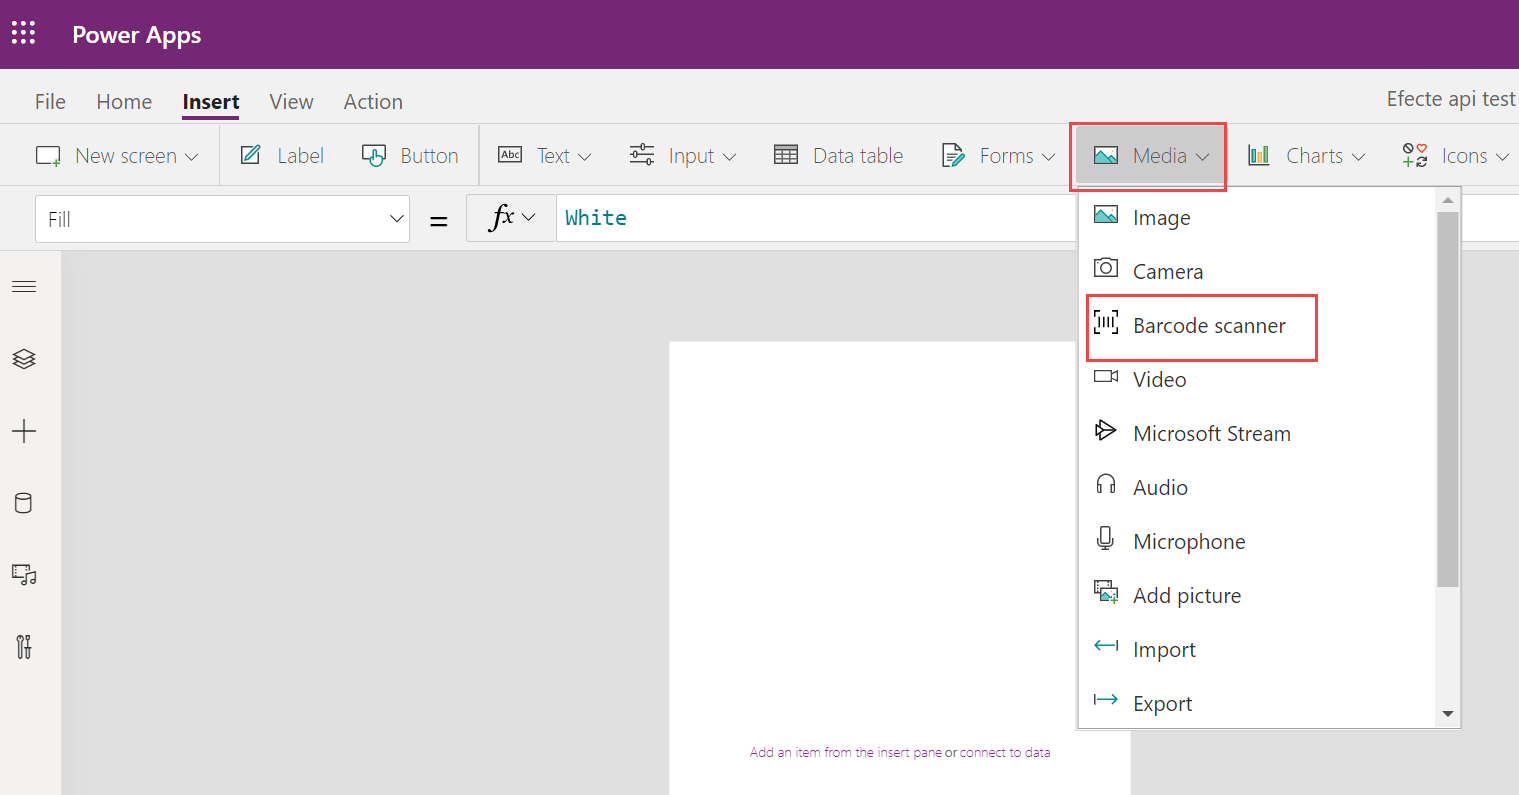
We’ll start by creating a blank Power Apps (mobile layout) and add a barcode reader to it:
Then we add the flows we just created as data sources:
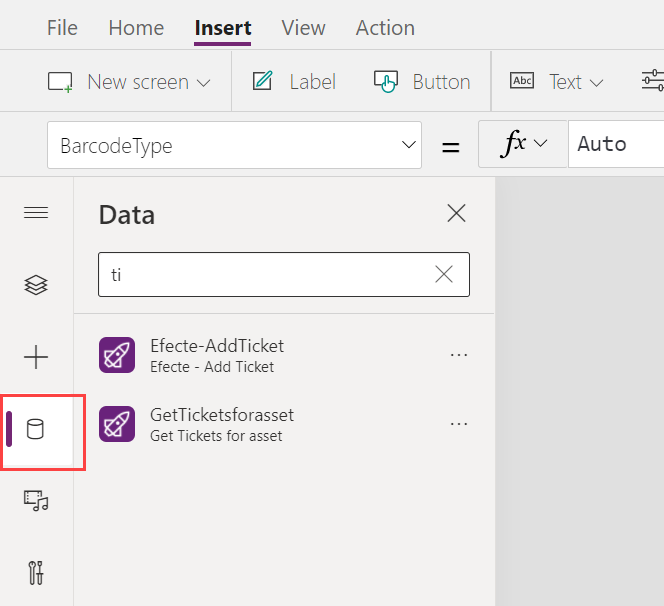
Get device information
We want to retrieve device information when a user scans a barcode. So we’ll add the following formula to the barcode readers OnScan event:
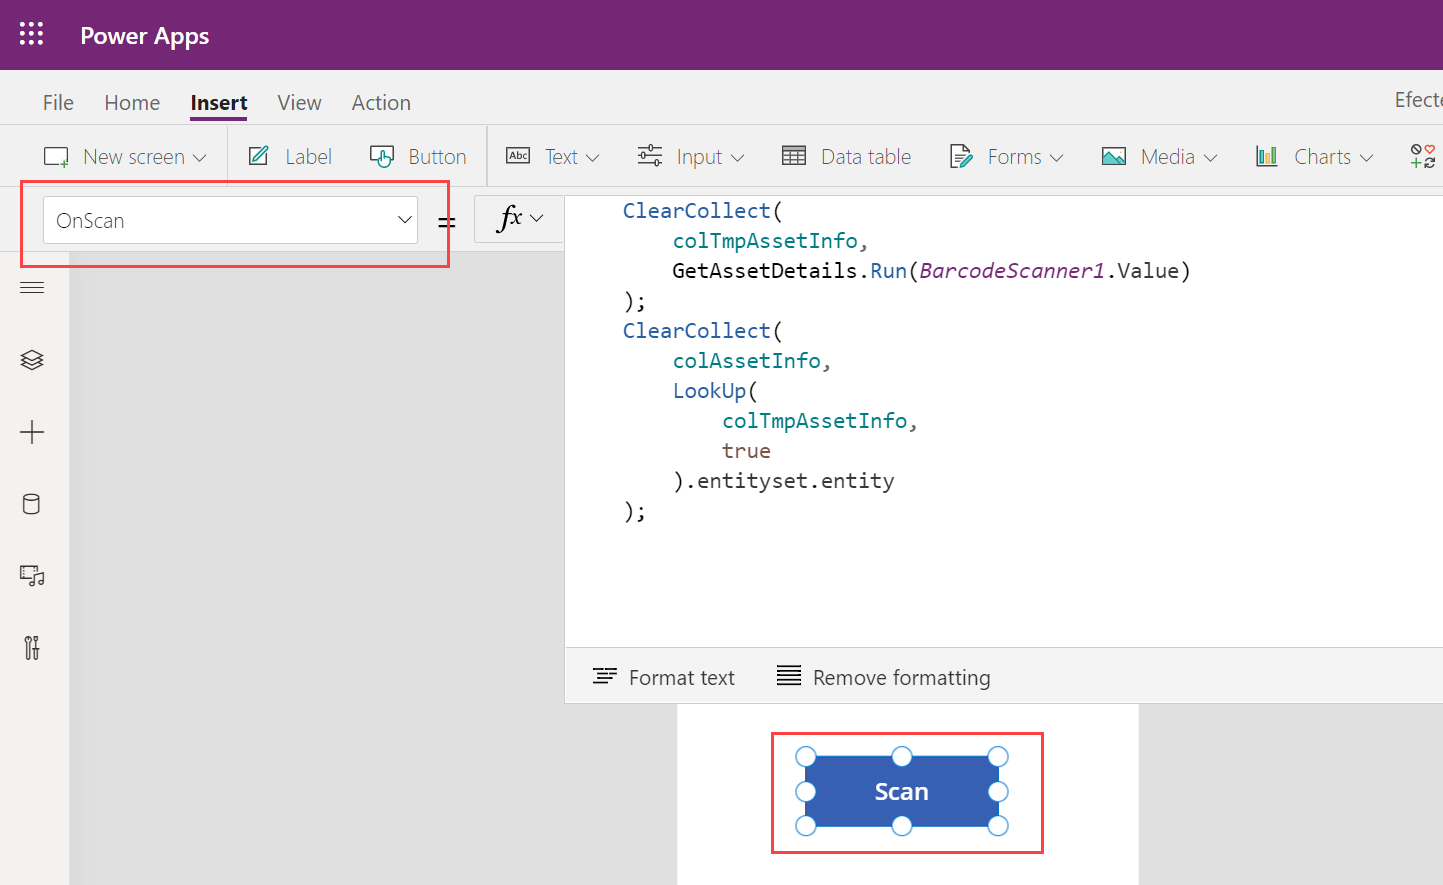
Using Flow, we retrieve the data of the device scanned into the collection (colTmpAssetInfo) from Efecte.
ClearCollect (
    colTmpAssetInfo,
    GetAssetDetails.Run (BarcodeScanner1.Value)
)
The return value is in a slightly inconvenient form. One record with ?xml and entityset blocks. Let’s make it easier to handle and retrieve the actual data to the variable (varAssetInfo).
Set (
     varAssetInfo,
     First (colTmpAssetInfo) .entityset.entity
 )
Now the content looks useful:

After scanning, we go to the Asset screen:
Navigate ('Asset Screen');That screen must, of course, be built first.
Asset screen
Create a new screen (Asset Screen) and add a few text fields to it. The device name can be found in the @name property of the variable.

The values of other fields can be found when doing a lookup on attributes table:
LookUp(varAssetInfo.attribute, '@name' = "Device owner"). Reference.'@name '
From there you can pick up anything you want on the screen.
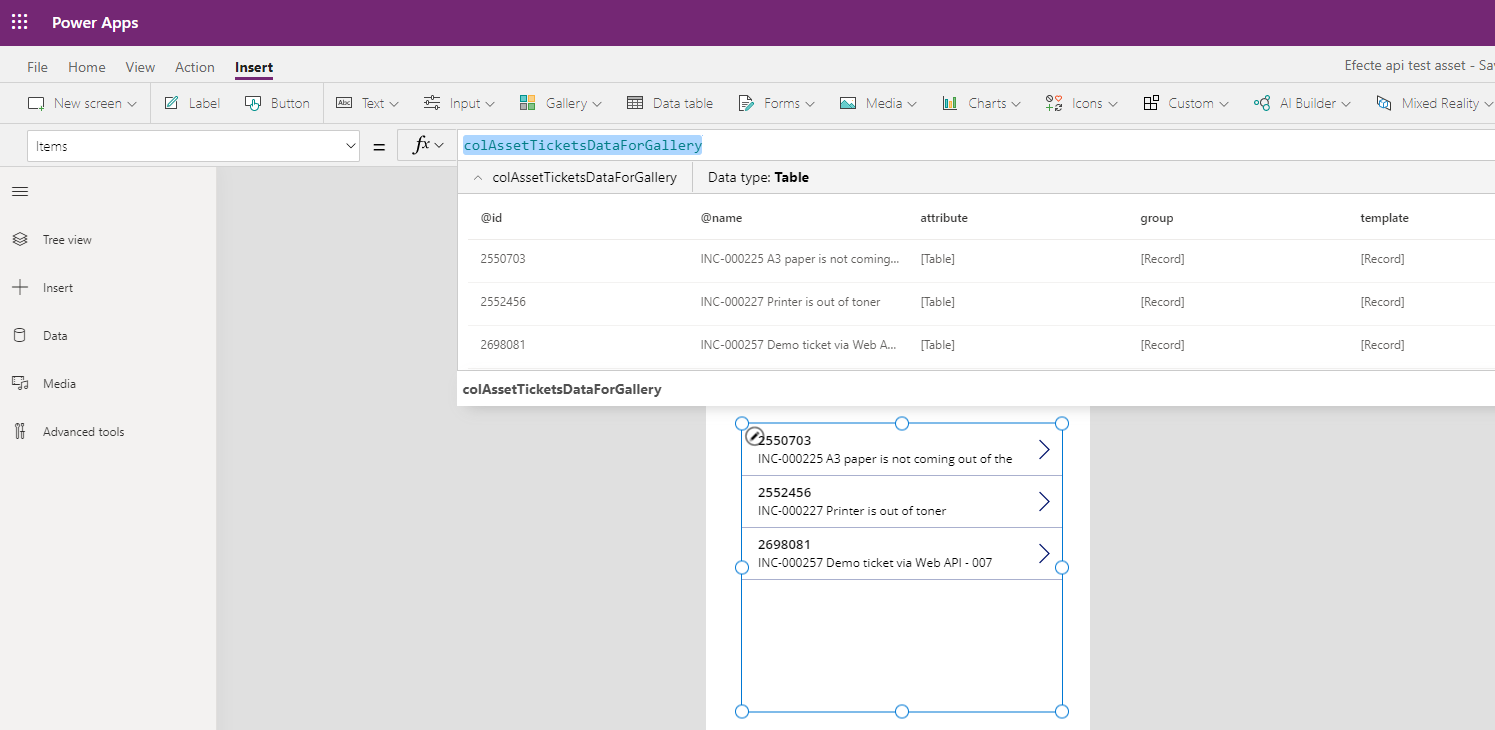
Tickets associated with the device
When opening the Asset screen (OnVisible), the tickets related to the device are retrieved in the collection:
ClearCollect(
  colTmpForTickets,
  GetTicketsforasset.Run(brcAssetScanner.Value)
);
ClearCollect(
  colAssetTicketsDataForGallery,
  First(colTmpForTickets.entityset).entityset.entity
);
Let’s add a gallery using that collection (colAssetTicketsDataForGallery) as the data source. This way we have the basic information of the device on the same screen, as well as the related tickets!
Creating a new ticket
Add a new screen for creating a ticket. Initially, it can have only fields for the ticket title and description.

The button triggers flow, which creates the ticket with the given parameters. The return value is stored in a variable (varTicketCreationReturnValue).
Set(varTicketCreationReturnValue,
       AddTicketRelatedtoAsset.Run(
          User (). FullName,
          User (). Email,
          inpSubject.Text,
          inpDescription.Text,
          "category here",
          BarcodeScanner1.Value
       )
   )
This is how the functionality of our application is piled up.
Cleaning up Power Apps
Finally, let’s think for a moment about what information we want to show to the user. And tidy up our app a bit. The end result looks like this:

API calls take time. A visualization is added to each call so that the user understands that something is happening in the background.

Summary
Expanding Efecte on the Power Platform was a fun exercise. You can make similar solutions with any system, as long as the target system provides APIs.
Note, however:
- The HTTP request action is a premium action. Application users must have at least a Power Apps per app plan license.
- You need an API KEY to use the API. In the case of Efecte, you will naturally get it from Efecte. In exchange for financial compensation, of course.