Connecting to External (Non-Microsoft) Resources from a Static IP with Power Platform

Last Updated: August 13th, 2025
Power Platform makes building powerful, low-code solutions easy, but solutions built on the platform also run on the platform. That means outbound calls from Power Platform environments use Power Platform’s IP range for that region rather than a unique IP under your control. This arrangement is less than ideal if you are, for example, connecting to an external API protected by a firewall. Optimal information security principles, such as Zero Trust, Least Privileged Access, Defense in Depth, and Assume Breach, all require firewalls to be open to as few sources as possible.
Adding the Power Platform IP range to your safelist is significantly better than allowing the entire internet. However, such an approach also includes undesired connections from inside and outside your organization, allowing all Power Platform users through, or at the very least, all from your region. Furthermore, these connections may be unreliable in the long term if Microsoft updates these values as its infrastructure evolves. To ensure optimal security, you must take control of the Power Platform’s outbound IP. Authorized outbound traffic must originate from a fixed IP you exclusively control.
Fortunately, there are ways to make this happen. In this blog, I’ll walk you through setting up the variant with the best balance of effort, cost, and security: using a function app connected to a NAT gateway.
Before proceeding, please note that these instructions are to connect Power Platform to external, non-Microsoft services. You can handle connections to most Microsoft services via Power Platform Virtual Network Integration, which provides an additional layer of security beyond what this process offers by keeping the connection entirely off the public internet. For optimal results, you can also establish a connection to the function app described here using Power Platform vNet integration, thereby securing your data at every step. For information on performing the vNet integration with Power Platform, see this blog post.
The examples below will use the standard HTTP action for simplicity’s sake. However, if you want to use vNet integration, you should use a custom connector instead and restrict access to your function app to your environment’s designated subnets.
As I mentioned, this example is just one of the options for making these connections. If you’re still weighing your choices, you can also consider connecting via an APIM instance instead of a function app. However, because the APIM requires vNet integration to use the NAT gateway, the APIM instance will need a premium license, which is easily two orders of magnitude more expensive than a function app with a flex license. Avoid this cost unless you require specific APIM features that cannot be reproduced cost-effectively in your function app.
A flex license will usually be sufficient for this, but even with a premium license, an Azure function app will cost only around 5% of the price of an API Management premium instance.
Prerequisites:
Before starting, ensure you have the necessary permissions to deploy Azure resources and the necessary permissions to create and/or use the Power Platform resources you wish to connect with. For this exercise, we’ll work without Power Platform vNet integration, but if you intend to use vNet integration from the Power Platform, ensure you meet the prerequisites for that as well.
The instructions below use the Azure Portal, but you can also complete the same task using the CLI or by deploying ARM or Bicep templates.
Step one: Create a NAT gateway
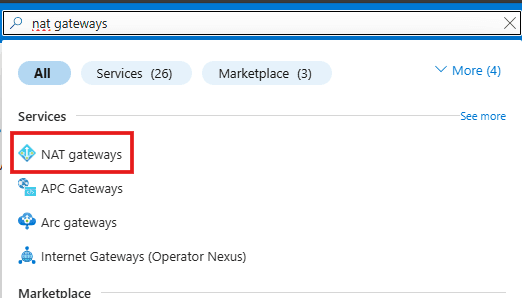
Begin by navigating to the Azure portal. Once logged in, type “nat gateway” in the search box at the top of the screen. From the results, select NAT Gateways as shown here.
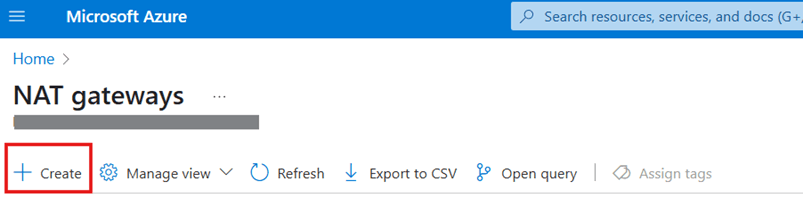
On the page that follows, select +Create:
From there, you’ll see a page like the one below.
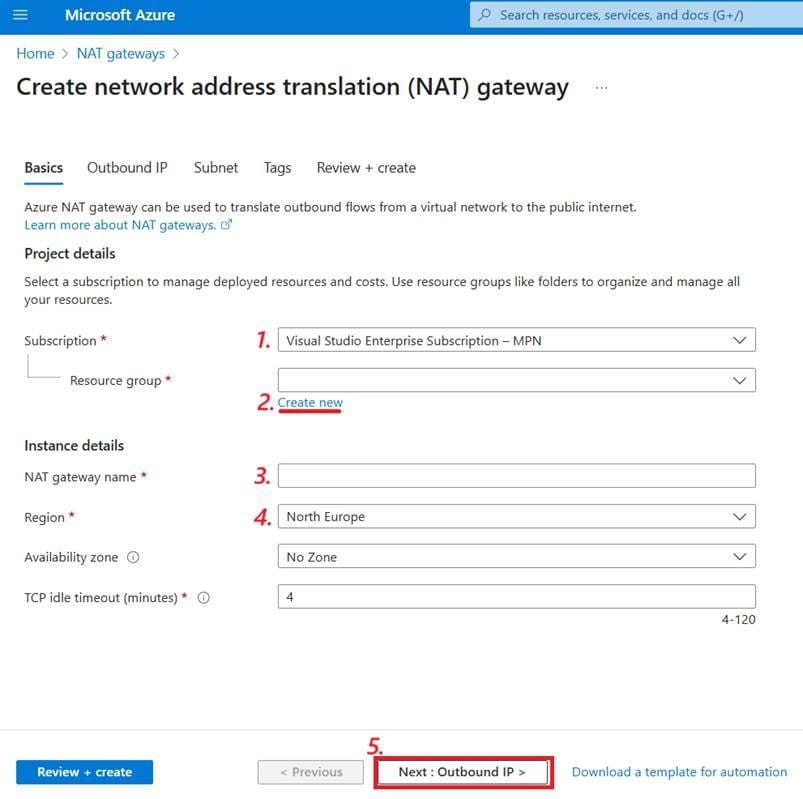
Follow the steps:
- Choose your subscription.
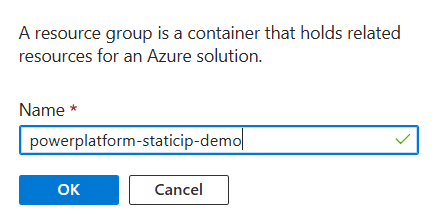
- Under your resource group, select Create new. While you can use an existing resource group, having separate groups for each project makes managing resources easier, so we’ll create a new one for this walkthrough. In the blade that pops up, type the name of your new resource group and click OK.

- Name your NAT gateway. Your naming choice does not affect functionality, but a good, descriptive name can make working with the resources easier in the future.
- Choose your region. Some of your resources must be in the same region to work together. Even when they don’t, it’s generally tidier and provides a better latency to keep them in the same place, so try to use the same region whenever possible. If you’re using Power Platform virtual network integration, I recommend that this be the same as your primary region. Before proceeding, it is advisable to check the regions that support flex consumption plans for function apps, as that will be the most economical option. You can find the list of currently supported regions here.
- Click Next: Outbound IP >
You’ll now see a page where you can perform the following steps:
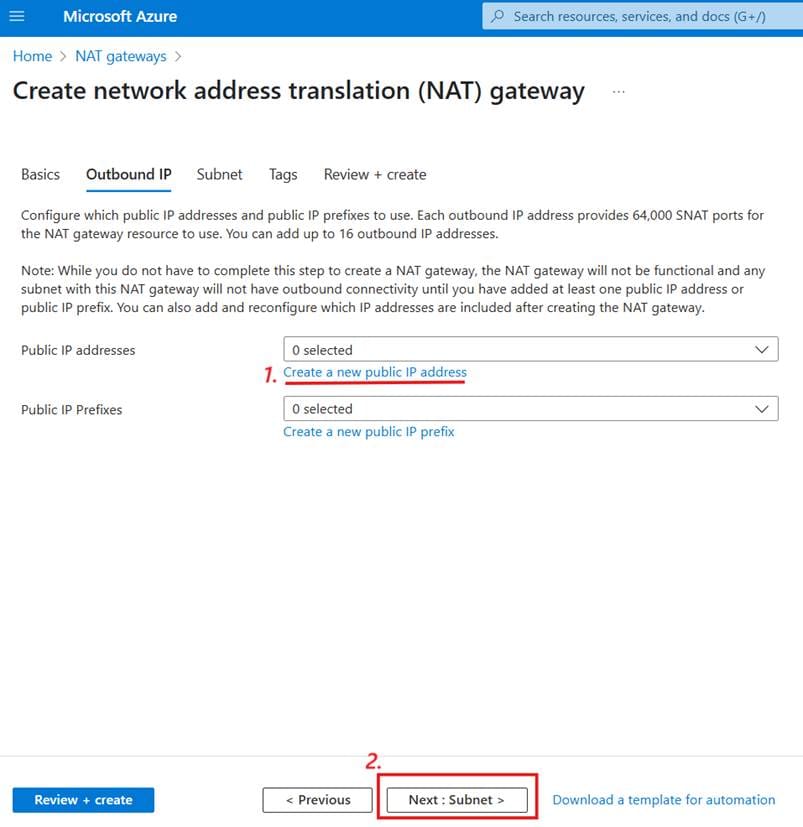
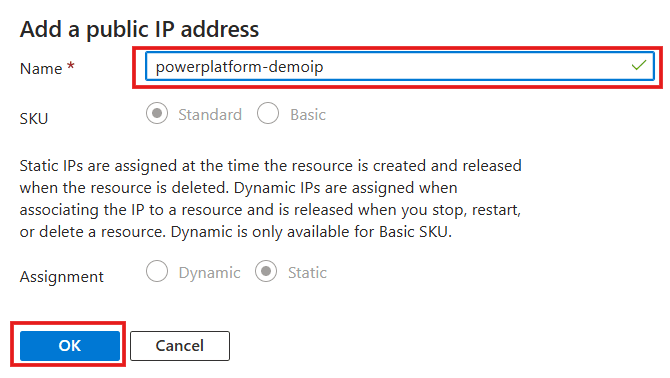
- Click Create a new public IP address. If you already have one, it’s possible to select it. However, as the goal is to have an IP address dedicated to this source, it’s better not to reuse anything. A box will appear where you can enter a name for your IP address and click OK.
- Click Next: Subnet >
You’ll now see a page like this:
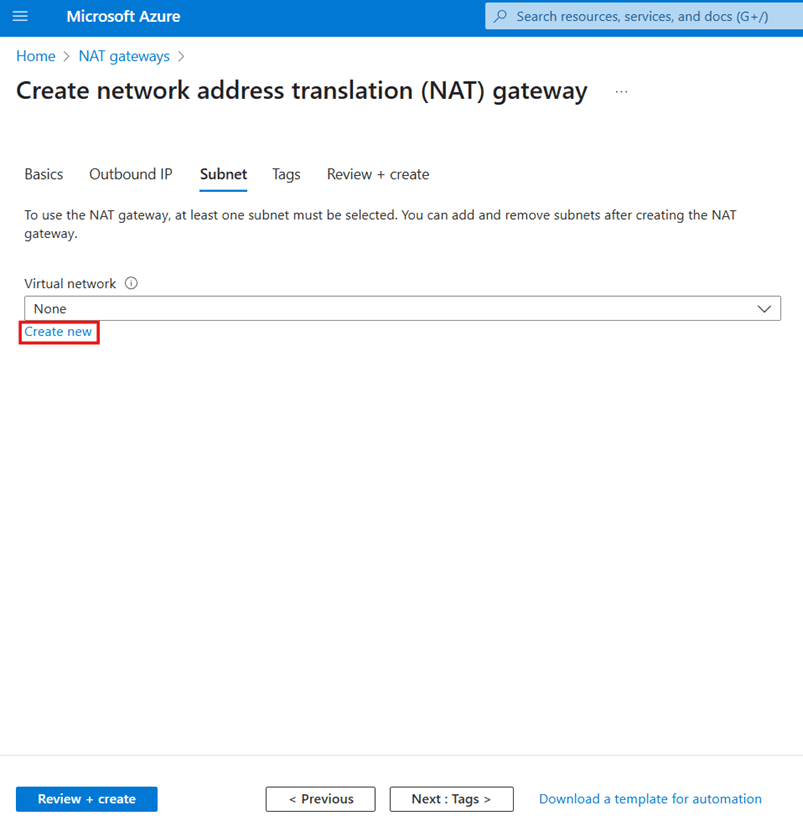
Using an existing virtual network is possible if you have already created one for this purpose. Again, remember that keeping your Azure resources separate from those they don’t connect to is good design, so if you’re only using this to handle outbound Power Platform communication, it’s best to use one exclusively for this purpose.
For this walkthrough, click Create new. Doing so will open a large blade on the right, like this:
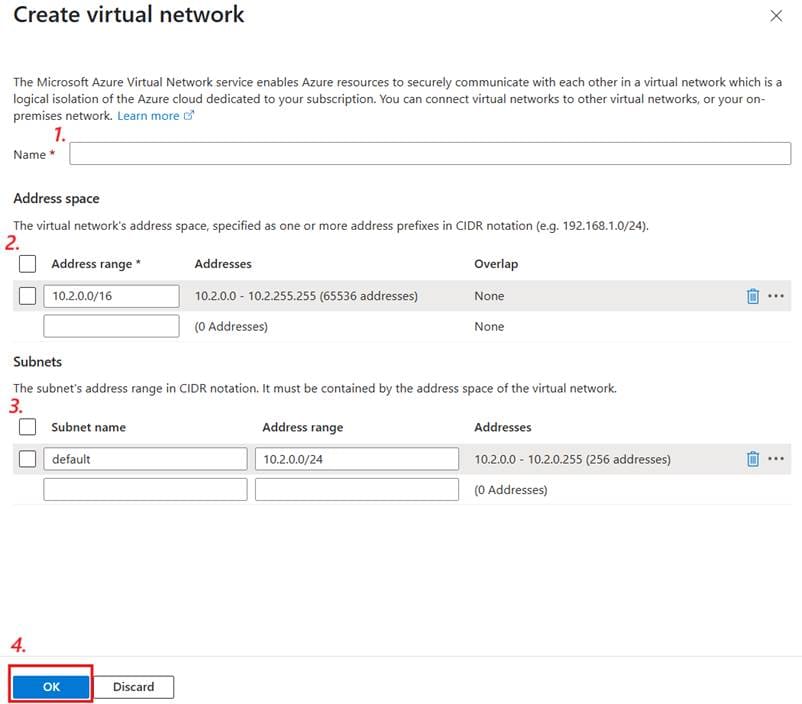
Follow these steps:
- Set the name for your new virtual network. Again, it’s best to follow good naming guidelines.
- Choose your address space. The default value is usually fine.
- Create at least one subnet. I recommend renaming the default subnet to something sensible and using that. The default /24 range will work, but if you’re trying to be economical with IP addresses, you can opt for a /26 range for the Flex Consumption plan we’ll use here (as with other Linux-based app plans).
- Click OK.
The blade will vanish, and the page will now look like this:
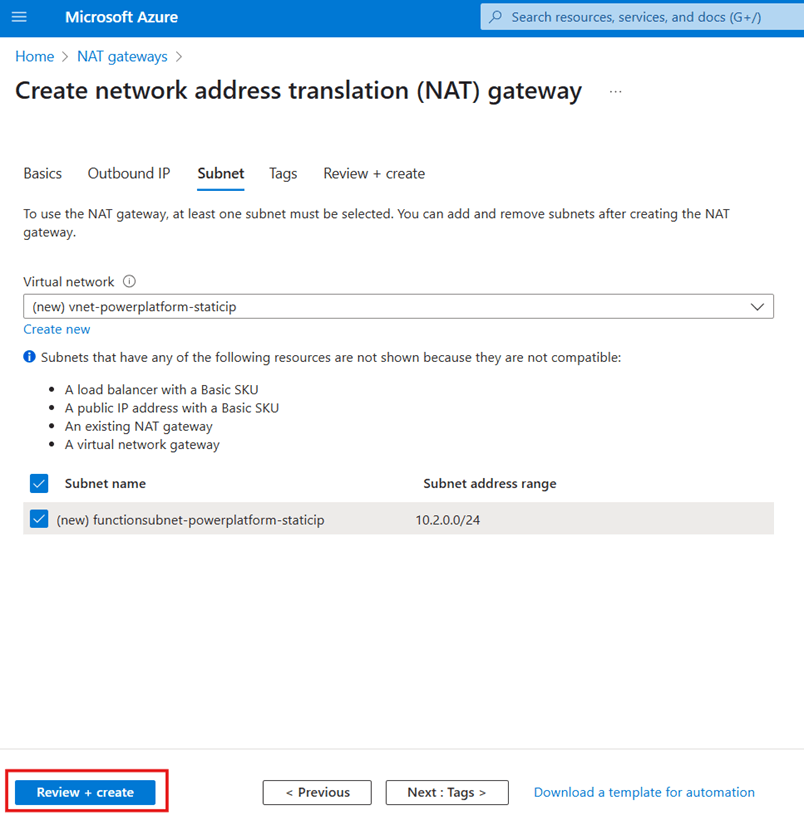
Click Review + create.
Next, you’ll see a validation page. If the validation fails, go back and fix any problems it highlights. If it succeeds, you’ll see something like this:
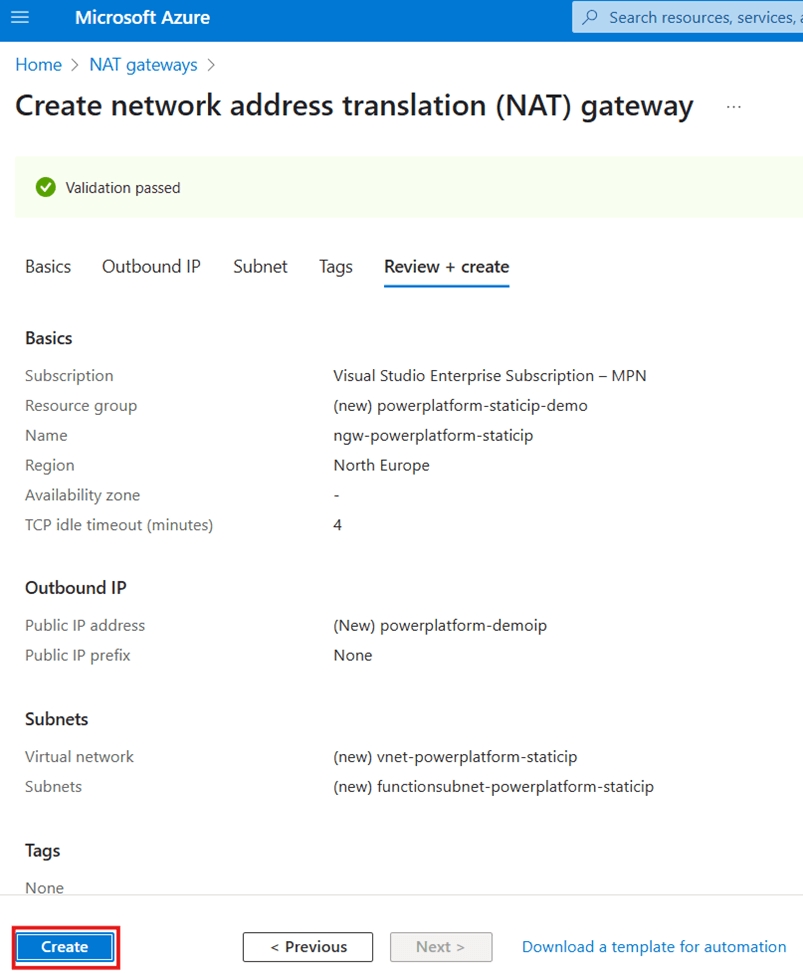
Click Create.
From here, you’ll end up on a deployment screen. It may take a few minutes for all your resources to finish deploying. Next, you can move on to your function app.
Step two: Create a function app
To begin creating your function app, click the search bar at the top of the screen again and type “function app” like so:

Click on Function App.
On the new screen, click +Create as you did with the NAT gateway.
You’ll now see a screen displaying your different plan options.
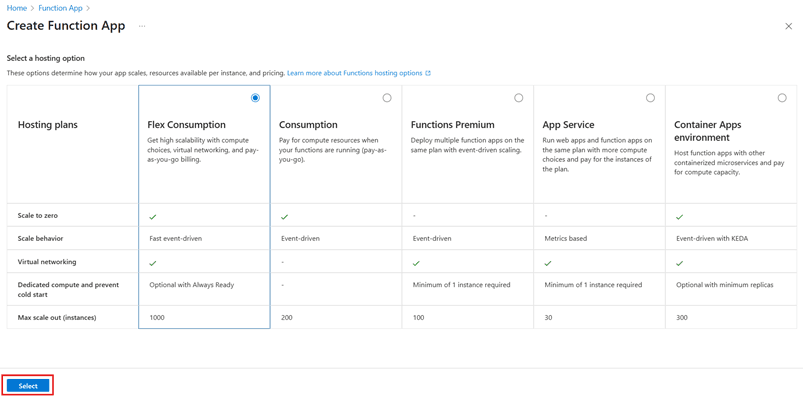
This solution requires virtual networking, but our compute requirements are minimal, so it’s best to opt for the Flex Consumption plan. That will meet the virtual networking requirement at the lowest cost. That should be the default, so click Select.
You’ll now face a page similar to the one you saw with the NAT gateway deployment. Ensure that it still has the correct subscription, and then follow the steps below:
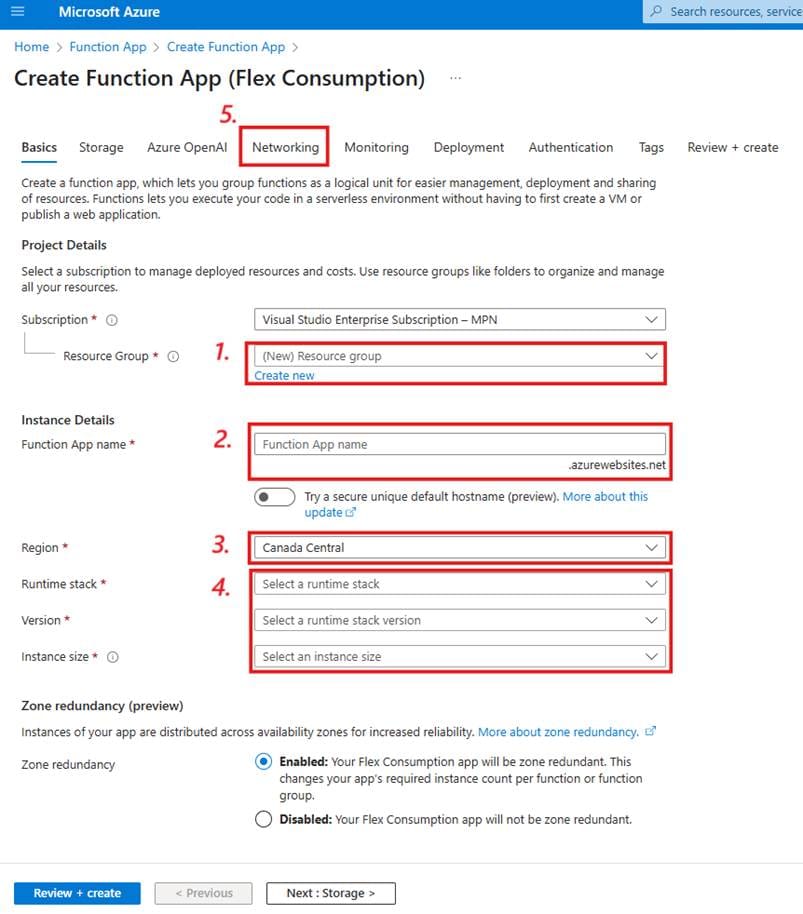
- Choose the resource group you created earlier.
- Choose a name for your function app.
- Choose a region. This region should match your virtual network, so keep the same one you chose before.
- These settings will impact the programming language and the compute power allocated to your app. Please note that options to edit the code in the portal are not available in Linux app plans, and the Flex consumption plan is Linux-only. I’ll code in C# for this walkthrough using an external editor. I don’t need more advanced libraries or much computing power to relay an HTTP request, so I’ll choose:
- .NET
- 8 (LTS), isolated worker model
- 512 MB
- Finally, move on to the Networking tab.
Once there, you’ll see a screen like this:
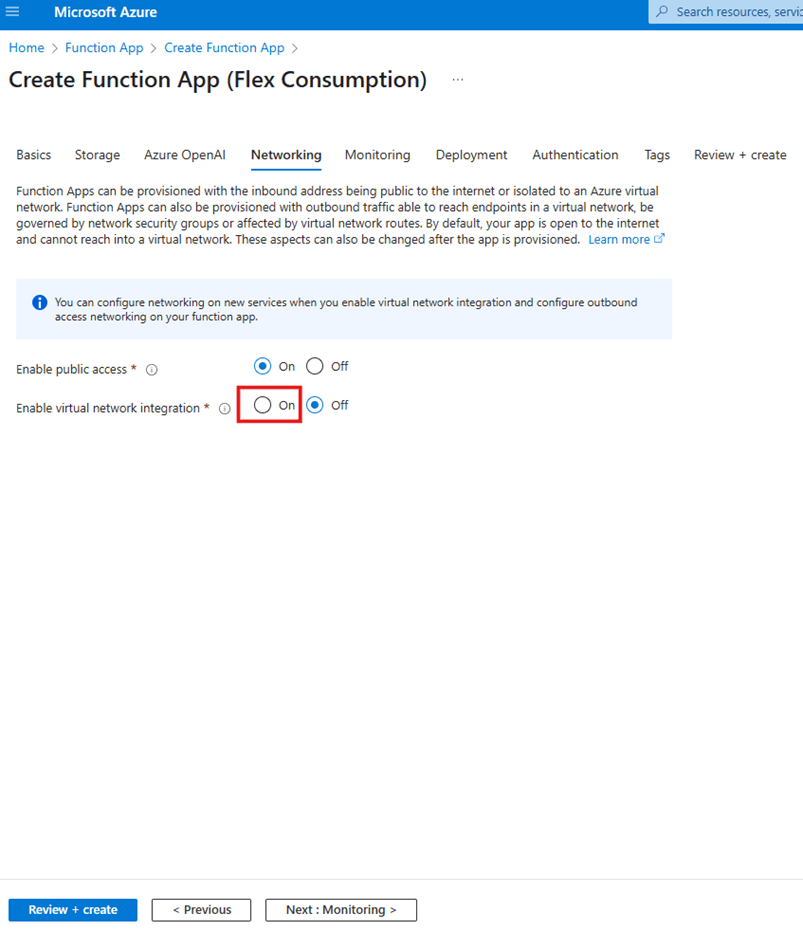
Set Enable virtual network integration to On. A new section will appear.
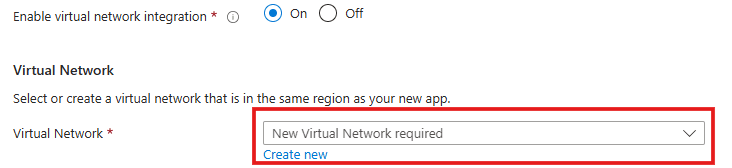
Choose the virtual network you created with your NAT gateway. More options will appear.
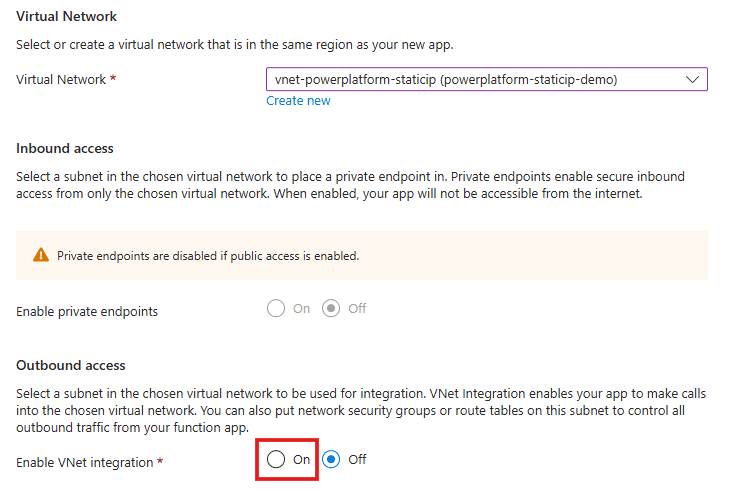
Set Enable VNet integration to On. Yet another option appears.
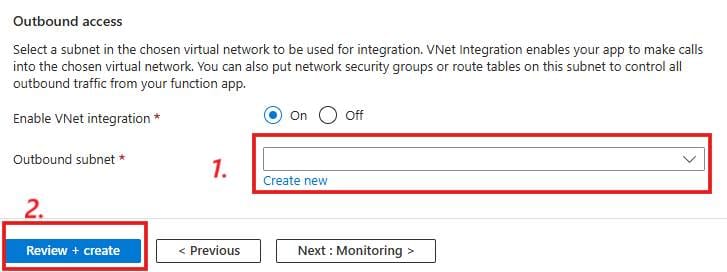
- Choose the subnet you created as your outbound subnet.
- Click Review + create.
Proceed as you did with the NAT gateway. If the validation fails, address any problems it identifies. If it passes, click Create and wait for deployment to complete.
You now have a function app that sends outbound communications through a NAT gateway using a static IP address. Now you need a function to relay your Power Platform communications.
Step three: Deploy a function
At this point, you should create and deploy a function to the app to relay your HTTP calls. As we’re working with the flex consumption plan, you’ll be required to develop the code in an external editor. Microsoft already has excellent tutorials on this, to which I have nothing to add, so I won’t repeat the steps. However, you can find the instructions here.
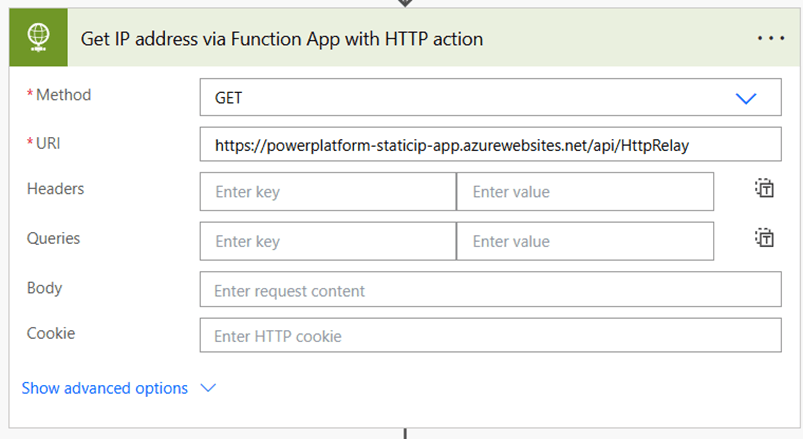
As for the code itself, here is an example in C# of an HTTP relay function. This code receives an HTTP call from another source (in this case, Power Platform) and relays it to an external API, sending the API’s reply back to the original sender. In this example, we use the Ipify API. It’s useful for demonstration purposes, as it returns the sender’s IP address, allowing us to see the difference between when it uses a Power Platform IP and when it uses the public IP address we deployed.
Code:
using Microsoft.AspNetCore.Http;
using Microsoft.AspNetCore.Mvc;
using Microsoft.Azure.Functions.Worker;
using Microsoft.Extensions.Logging;

namespace ff.HTTPRelay
{
    public class HttpRelay
    {
        private readonly ILogger<HttpRelay> _logger;
        private static readonly HttpClient httpClient = new HttpClient();

        public HttpRelay(ILogger<HttpRelay> logger)
        {
            _logger = logger;
        }

        [Function("HttpRelay")]
        public async Task<IActionResult> Run([HttpTrigger(AuthorizationLevel.Anonymous, "get", "post")] HttpRequest req)
        {
            _logger.LogInformation("C# HTTP trigger function processed a request.");

            // Forward the request to IPify
            var response = await httpClient.GetAsync("https://api.ipify.org?format=json");
            var ipAddress = await response.Content.ReadAsStringAsync();

            return new OkObjectResult(ipAddress);
        }
    }
}
Step five: Test the setup
Finally, let’s create a cloud flow in Power Automate to test the function. This section is likely familiar to most readers of this blog, but if you need assistance, you can refer to a guide like this one. The configurations for each step of our test flow are detailed below:
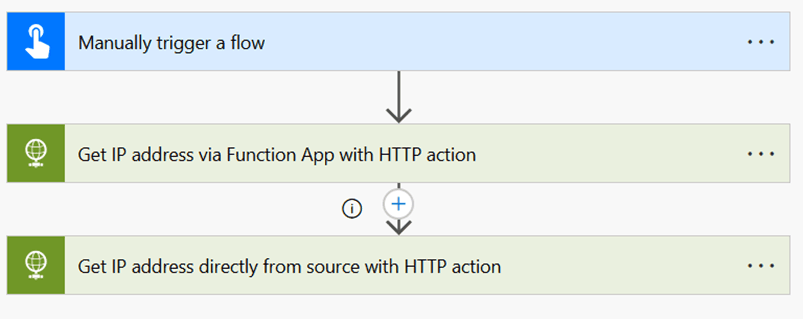
First action, using an HTTP request action to call the app:
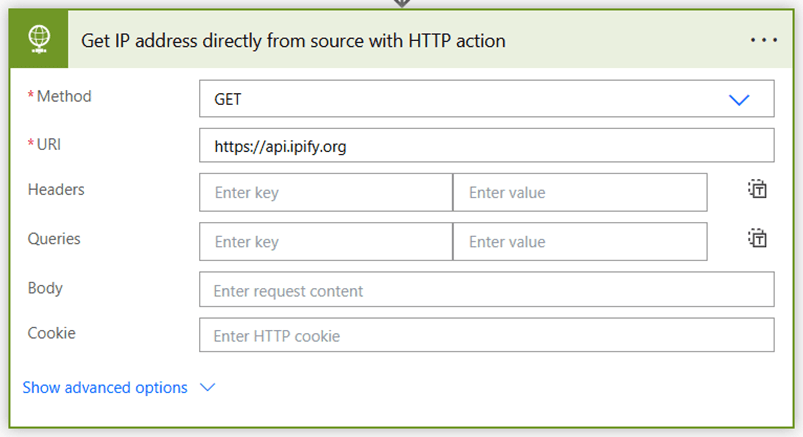
And the second action to compare, using an HTTP action to call the Ipify endpoint directly:
Run the flow. If your configurations are correct, you’ll see the static IP address you created in the body of the first action and one of Power Platform’s IP addresses in the second.
To configure this setup with an external IP address of your choosing, update the function code to use the new endpoint instead of Ipify. Remember to pass the request (req) as needed.
Conclusion (and why you should use virtual network integration for this!)
You should now be able to send outgoing messages from a Power Platform resource using a static IP address. However, while the above solution omitted it for brevity, I strongly recommend using Power Platform virtual network integration for this purpose. Your target resource likely needs a static IP address to securely allow your resources to access the endpoint without admitting requests from unwanted sources. Routing the requests through an unsecured function app would undermine that goal.
It wouldn’t help to block everything but your function app, in other words, if your function app allows any internet resource to make the call through it. Such an arrangement would give the target’s firewall a public back door. For the restrictions to be meaningful, you must maintain that same level of security across your entire connection chain. True, you can set permissions and authentication requirements (especially via Entra ID authentication) on your app, but for proper defense in depth, that protection should extend to the networking level as well. That means making your function app as secure as possible so only the desired Power Platform resources can reach it, which means using Power Platform virtual network integration.